DermNet provides Google Translate, a free machine translation service. Note that this may not provide an exact translation in all languages

Translate

Image acquisition in dermatology

Author: Dr Anthony Yung, Dermatologist, Hamilton, New Zealand, January 2017


toc-icon
Table of contents
arrow-right-small

A few basic guiding principles must be followed in order to acquire images in a format that will allow the adequate assessment of a skin condition. Before taking photographs, it is important to:

  1. Ensure documented informed consent is obtained before acquisition of images. If images are intended for publication or web based use (or might be used by someone else for this purpose), ensure adequate discussion of the ramifications and implications of this.
  2. Ensure adequate preservation of patient privacy in the acquisition, storage and during use of any images.

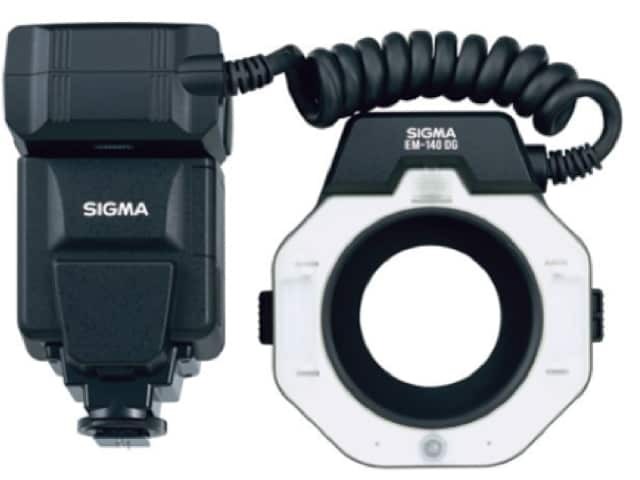
There are a variety of devices that can be used for dermatological imaging; these devices include smartphone/tablet attachments, point-and-shoot cameras, and interchangeable lens system cameras. For more information about the devices to use, read Digital cameras for dermatological imaging.

Type of images to take

For accurate documentation of a skin condition, it is important to take, at the very least, three types of images:

  1. Contextual images
  2. Macro images
  3. Micro images

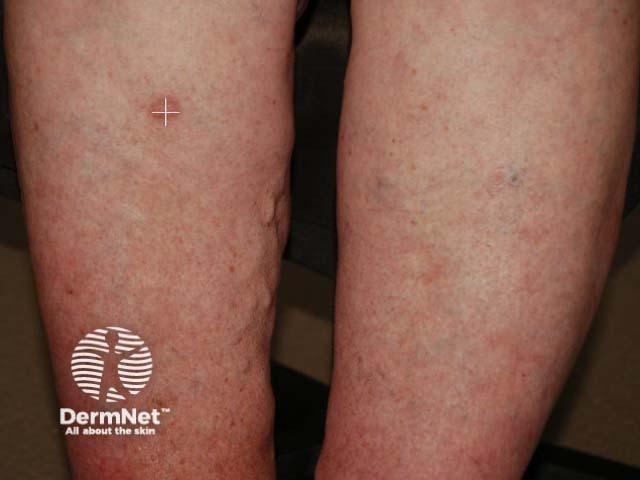
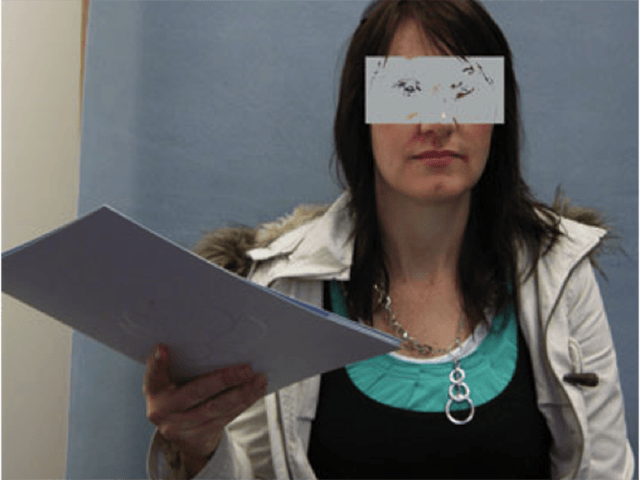
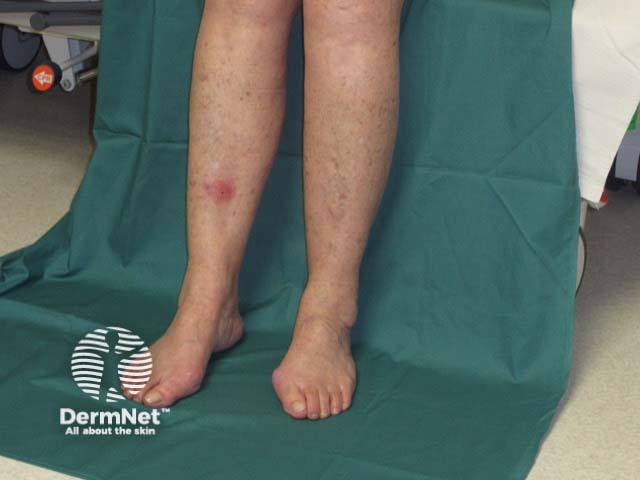
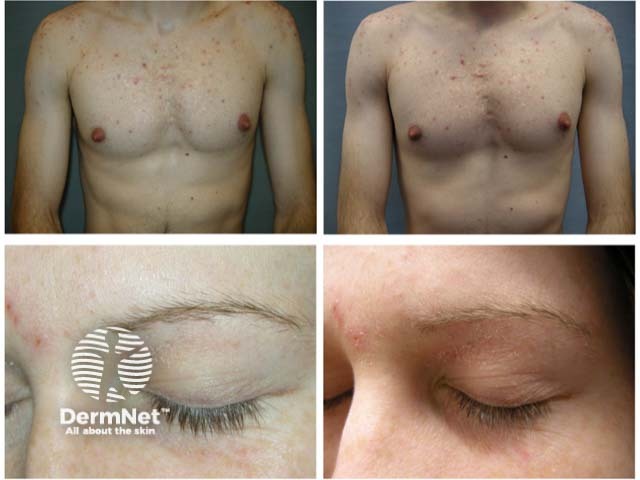
Contextual images in dermatology are images where the image of a lesion or dermatosis or ‘rash’ is captured in relation to a specific site or region of the body which gives some indication of anatomic location and/or size and/or shape.  It may also convey information about impairment of function (eg, fixed flexion deformity from linear morphoea) and/or disfigurement. Contextual images give an ‘overall’ view or appearance of a lesion or dermatosis in relation to the body region.

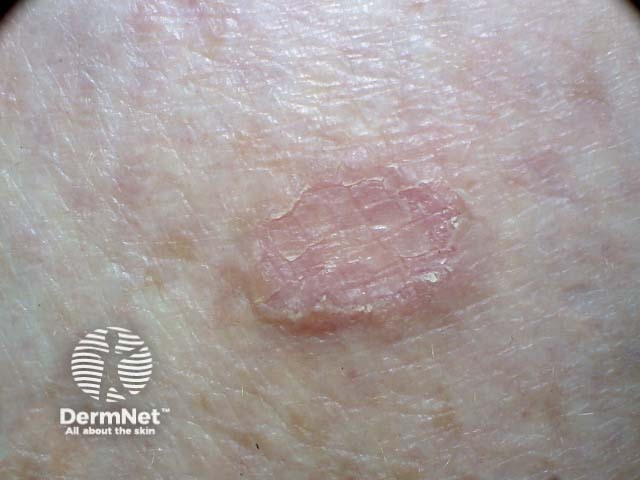
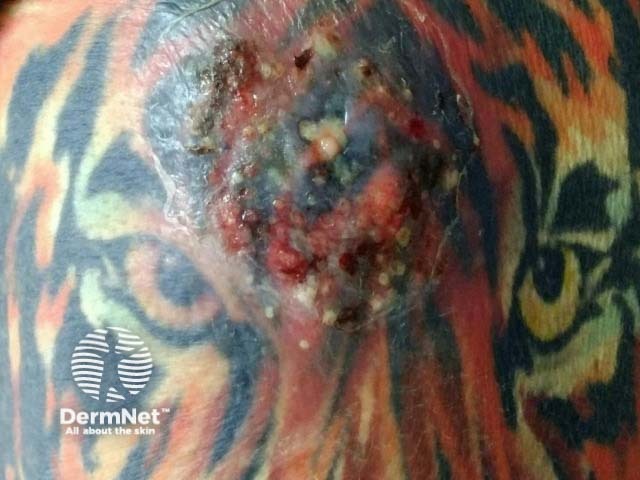
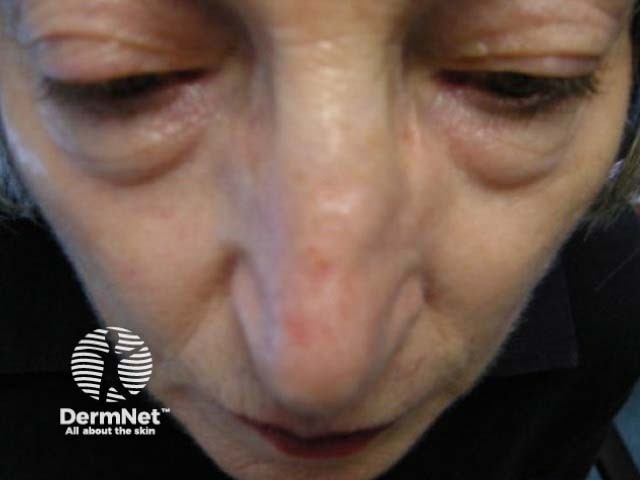
Macro images (photomacrography or macro photography) are close-up images of a subject. In dermatology, it usually refers to close-up images of a lesion or dermatosis. Normally anatomical context is largely lost due to the image being focused on the lesion or dermatosis to the exclusion of surrounding anatomic structures. Macro images of a subject typically have a scale of reproduction of 1:1 (life size) or 1:2 (1/2 life size) when used with 35 mm standard film or digital image sensors.  If smaller sized sensors are used in digital cameras, smaller ratios can be used to obtain the life-sized capture of a lesion or dermatosis.

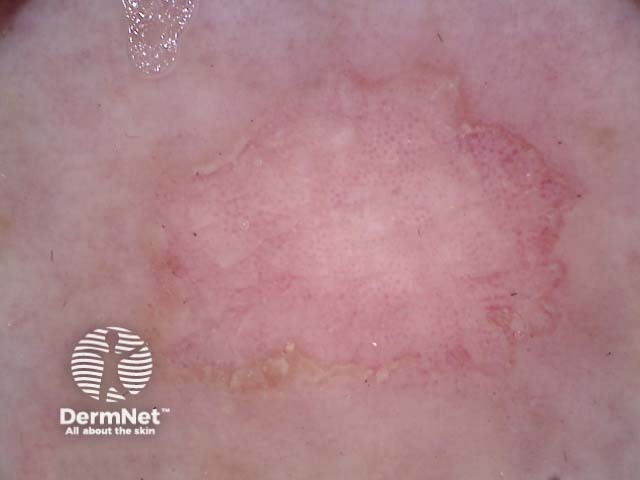
Micro images (or photomicrography) in general refer to the imaging of a subject (lesions or dermatoses in dermatology) with a greater than 1:1 scale of reproduction. With increasing magnification of a subject, all anatomic landmarks are lost with this degree of magnification. Most commonly in dermatology, dermatoscopic imaging is capturing a lesion that has already had roughly 10–15x magnification. Micro images in dermatology also encompasses the capturing the images directly from a microscope at x 5, x 10, x 20, x 40, and x 100 magnification. In dermatology, the final scale reproduction ratio of micro images is often far in excess of 1:1 scale reproduction due to the sensor size used (the sensor size used is often less than the 35-mm standard for film/digital image sensor size) and the optical magnification of the device (dermatoscope or microscope objective lens). Even more extreme magnifications can be used to image tiny parasites like mites, fleas, lice and other subjects with portable USB digital microscopes.

Images of porokeratosis

Steps during image acquisition

  • Use lowest film speed (ISO) possible.
  • Use highest quality JPEG setting (ie, with the lowest compression of image information) possible to retain detail. Alternatively, if you want ultimate control over image quality, you can shoot in RAW mode if it is available on your device. (RAW is a file format that contains all data recorded by the camera sensor when an image is taken; in comparison, when shooting in a format like JPEG, image information is compressed and lost. Note, however, RAW file sizes are very large and need post-processing of images after their capture — usually on a computer or tablet.)
  • Ensure adequate lighting of the subject. The better the lighting, the lower the ISO that can be used.

  • Ensure the imaging device has an appropriate white balance setting to allow a faithful colour rendition, and/or use an external light source to help adjust the colour balance.
  • Hold the device steady when taking the image.
  • Highlight or focus on the subject. Keep backgrounds as simple as possible. Avoid unnecessary distracting colours in the background or objects in the environment. As much as is practical, try to fill the frame with the subject. If possible, use the skin as a background.

  • Try to avoid including distinctive features or anatomic landmarks that may identify the patient in images wherever possible.
  • If there is insufficient ambient light available in the environment, use a flash. If there is doubt, take two copies of every image: one with flash and one without flash.
  • If using a flash, try to minimise reflections from the flash by avoiding shooting at a 90-degree angle to the skin surface. When using a flash for limb or body shots, try to avoid shadows by diffusing the flash (eg, by covering it with a semi-opaque covering) or bouncing the flash off a shiny surface. If using a flash very close to the surface of the skin, then being able to use flash compensation (having the ability to reduce or change the output of the flash) and/or exposure compensation (having the ability to reduce or change the degree of exposure of an image) is helpful.

  • Ring flashes are great for close-up even illumination, but tend to flatten an image by reducing visible contours. A carefully used directional flash can sometimes convey a better impression of depth, contour and shape and give a more pleasing image.
  • Avoid the use of a wide-angle lens or a wide-angle lens setting as it may introduce significant geometric distortion and/or unrealistic reproduction of features (eg, the nose appears too big on a face).
  • Macro photography, using dedicated macro lenses, with interchangeable lens cameras is generally associated with a very narrow depth of field, meaning that the accuracy of the point of focus and the aperture (the amount of light reaching the image sensor) used is very important to ensure the whole subject is in focus. The use of smaller sized camera sensors is associated with a much greater depth of field, meaning that a greater portion of the subject is more likely to be fully in focus if the focus is accurate (ie, increasing depth of field: smartphone/tablet camera sensor > point-and-shoot camera > 1 inch sensor camera > micro 4/3 camera > Advanced Photo System type-C [APS-C] sized sensor camera > 35 mm-sized full-frame camera).

  • Dedicated macro lenses can capture images at 1:1 (life-size reproduction) or 1:2 (1/2 life size) ratios of reproduction — more than enough for dermatology requirements. Short macro lenses (50–60 mm 35 mm-equivalent lenses) are small but have short minimum-focusing distances from the front lens to the subject, which may cause problems with lighting or be distracting for the subject (eg, children). 100 mm macro 35 mm-equivalent lenses for use with digital single-lens reflex (DSLR) cameras have fewer issues with illumination and shadowing from the lens due to longer working distances but are bigger in size. Lesser ratios of reproduction may still be sufficient if images are cropped.
  • Cropping (using only a selection or portion of a larger image) a high-resolution image may still yield sufficient image quality for use, but this depends on the imaging device used and intended application of the image (eg, web-based viewing requires a much lower image resolution and quality in general compared to images for a printed poster). 


On DermNet NZ

Other websites

Books about skin diseases


Related information

Sign up to the newsletter