To demonstrate the basic principles of suturing for the closure of cutaneous surgical wounds.
To obtain the best results, it is important to have good quality instruments that are the correct size for the location and nature of the wounds being closed. The instruments also need to be correctly sterilised and handled carefully.
The basic suturing kit includes:
The two biggest considerations when choosing a suture are the location and tension of the wound. Other important considerations are tensile strength, knot strength, handling, and tissue reactivity. Sutures are divided into two major groups:
Suture needles also come in a variety of shapes and sizes. Curved needles are almost exclusively used in dermatological surgery. Cutting needles move through the tissue more easily and may have their primary cutting edge on the inside of the curve (conventional cutting) or outside of the curve (reverse cutting). The benefit of reverse cutting is that the tapered puncture left by the suture is directed away from the wound edge and therefore tissue tearing is less common. Non-cutting round needles cause even less tissue tearing and may be especially useful in delicate areas and fascia.
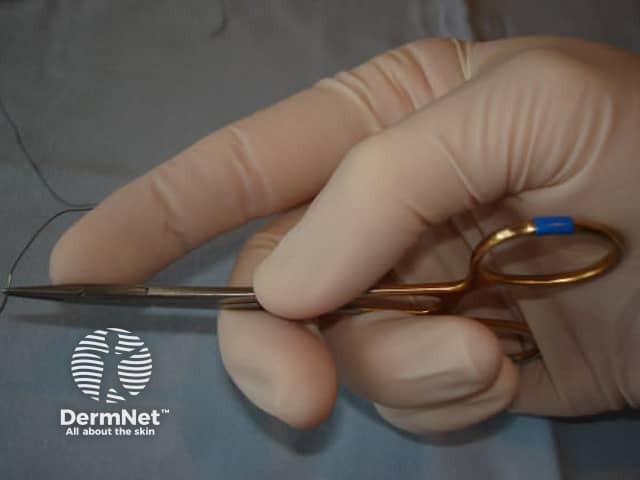
The needle holder should be held with the palm grip as illustrated in Figure 1. This allows superior wrist mobility than if the fingers are placed in the handle loops. The needle should be grasped between 1/3 to 1/2 of the distance between the suture attachment and the needle tip.
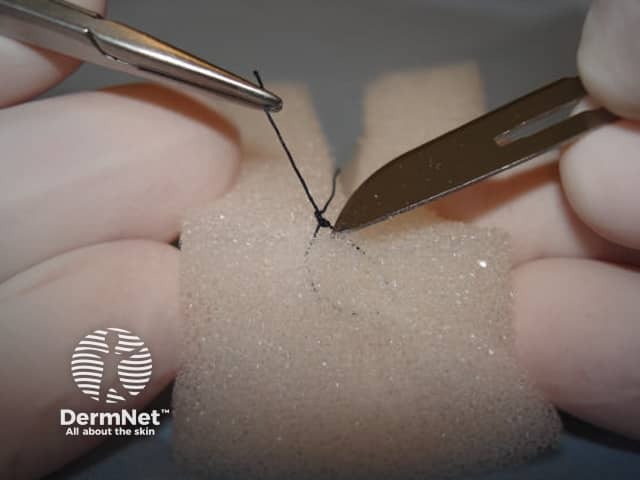
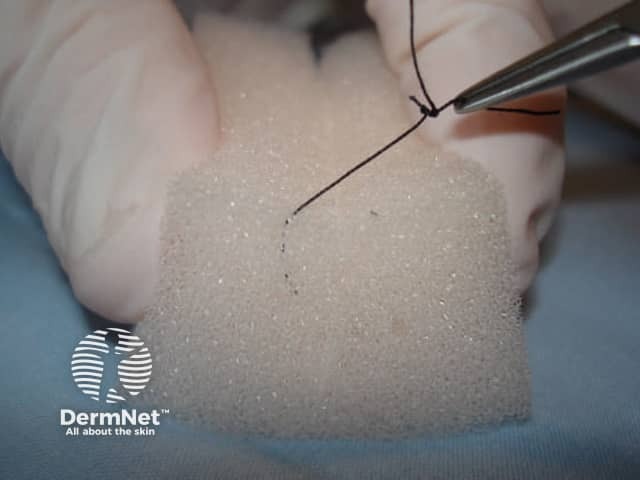
The long end of the suture is wrapped around the tip of the closed needle holder twice before grasping the short end of the suture with the needle holder. The first double knot is then pulled gently tight. Two (or three) further single throws are then added in a similar fashion to secure the knot. Each throw is pulled in the opposite direction across the wound edge. See Figure 2

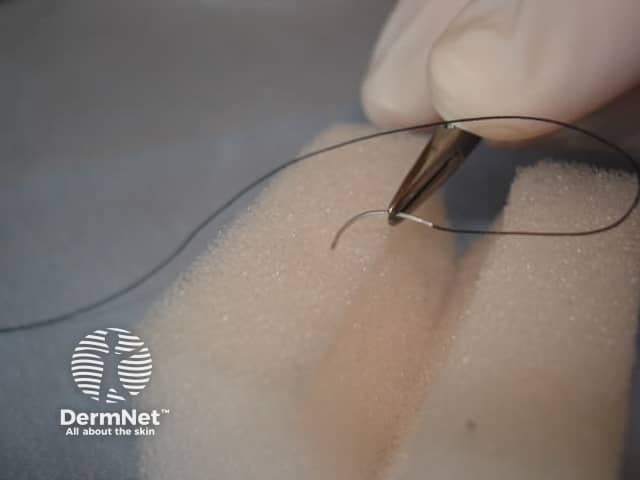
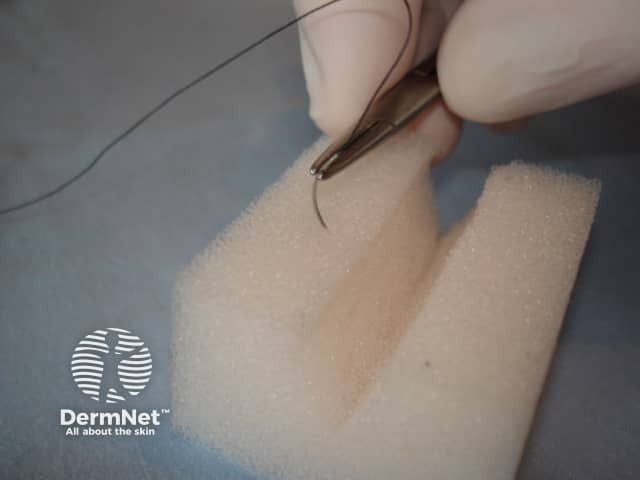
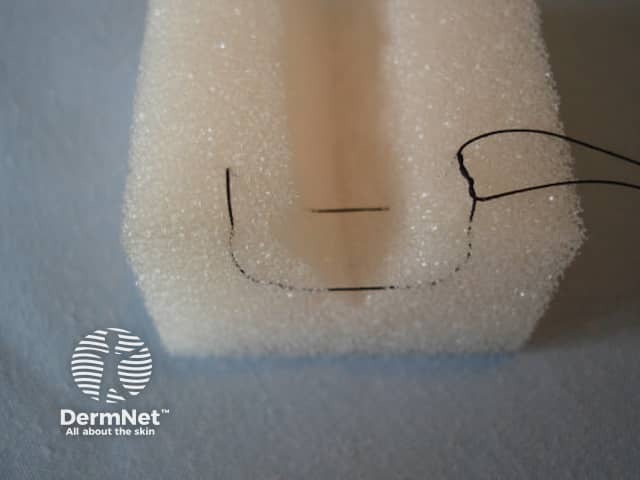
The wound edge should be gently stabilised with either toothed forceps or a skin hook. The needle should enter perpendicular to the skin 3-5mm from the wound edge. See Figure 3. Entering perpendicular causes a wider bite of deeper tissue to be included in the suture than at the surface and consequently causes more wound edge eversion and ultimately a superior cosmetic result with a thinner scar. A common mistake is to enter the skin at a flatter angle resulting in much less wound edge eversion as shown in Figure 4. The knot is then tied as seen in Figure 2.
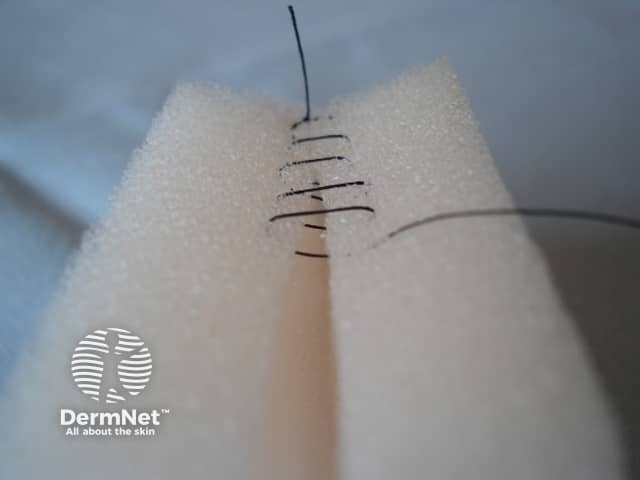
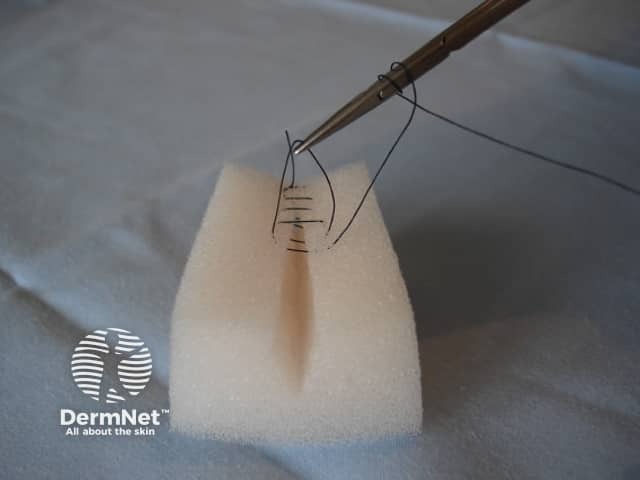
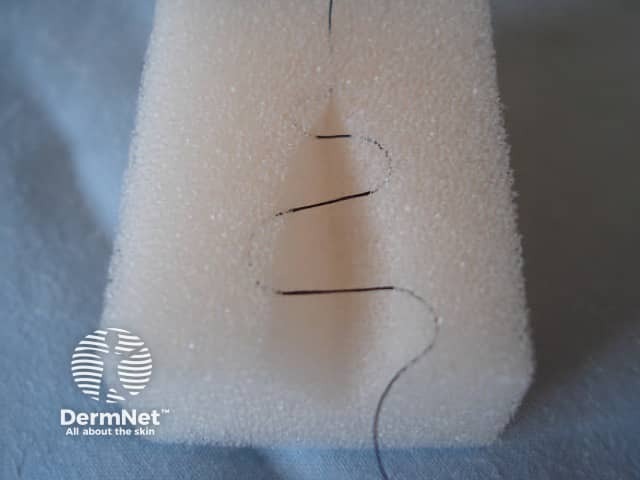
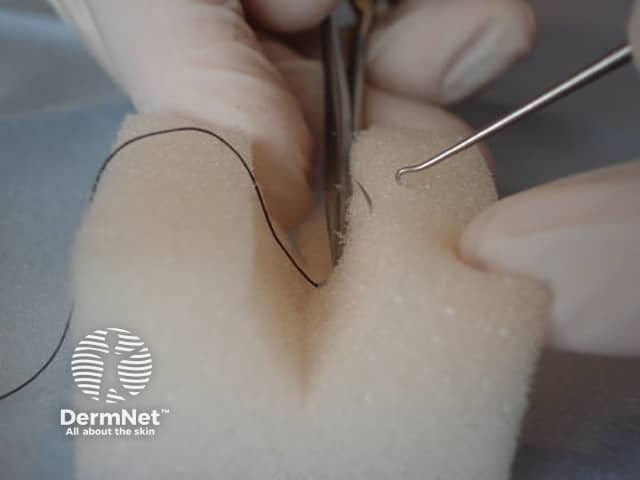
Using a continuous suture rather than multiple interrupted sutures offers a significant time saving. However,it is not as strong as interrupted sutures, and can strangulate the blood supply in wounds under more than minimal tension. An interrupted suture is performed, but only the free suture end is cut before the needle is reintroduced and directed diagonally across the wound to exit the skin on the other side. The suture is then brought across perpendicular to the wound edge and reintroduced on the first side again with each bite. See Figure 5. Once the entire wound is closed, a loop is made with the last pass of suture, and this loop is grasp by the needle holder to tie the knot. This is demonstrated in figure 6.
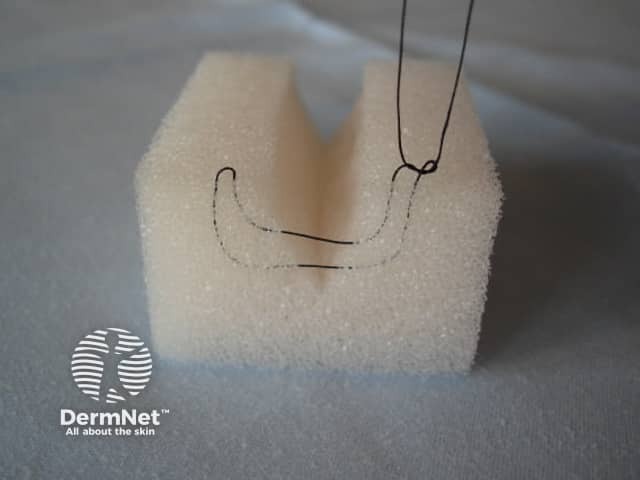
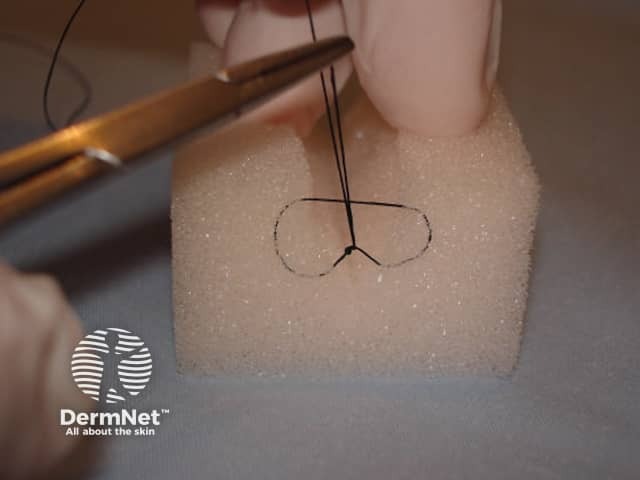
This suture provides excellent wound support, decreases dead space, and provides superior wound edge eversion. The needle is introduced 5-10mm from the wound edge and a deep bite of tissue is taken before exiting the skin in the same position on the opposite wound edge. The needle position is then reversed in the needle holder, and the needle is reintroduced 1-3mm from the second side of the wound and a smaller bite of tissue is taken before exiting on the first side of the wound. A knot can then be secured as shown in Figure 7.
This suture is especially good for distributing wound tension across larger wounds particularly for the initial sutures. The needle is introduced 5-10mm from the wound edge and exited on the opposite side of the wound. The needle is then reintroduced on the second side of the wound but 3-5mm along the wound edge from the exit point. The suture exits in the same position on the first side of the wound and the suture is tied as shown in Figure 8. The disadvantage of this suture is the risk of strangulation of the dermal blood supply and subsequent edge necrosis.
The benefit of this suture is the minimal epidermal puncture points allowing the suture to be left in place longer without suture-track scarring. The needle is introduced 10mm distal to one wound end and brought out inside the apex of the wound within the dermis. The free end of suture can be tied off on itself, or secured with a bead or crimp. Horizontal bites of dermis are then taken from alternating sides of the wound working towards the other wound apex. The second epidermal puncture is made when the needle exits 10mm from the other end of the wound. See figure 9. The second free end can be secured in the same way as the first. Alternatively, absorbable suture material can be used and the ends tied off underneath the skin surface.
This suture is extremely important for distributing wound tension to the dermis rather than the epidermis and also for closing dead space. It provides longer-term support to the healing wound and improves the cosmetic result. The wound edge is everted with a skin hook and then an absorbable suture is introduced at the subcutaneous level and brought back out at dermal level on the same side of the wound. See figure 10. The needle then enters the same dermal level on the opposite side of the wound and exits the in the same subcutaneous level as it was initially entered into on the first side of the wound. The knot is tied deep at the subcutaneous level and the free ends cut short. See figure 11.
The time to suture removal depends on the location and the degree of tension the wound was closed under. This varies between surgeon and situation, but as a general rule sutures on the head and neck are usually removed between five and seven days post-operatively, while sutures on trunk or extremity wounds are typically removed between ten and fourteen days. To remove sutures, one tail of the suture should be grasped with forceps and pulled gently towards one side to the wound, elevating the knot. The opposite side of the suture should then be cut with stitch-cutters or fine suture scissors immediately under the knot. See Figure 12. The suture can then be pulled out of the tissue by pulling towards the opposite side of the wound as seen in Figure 13.